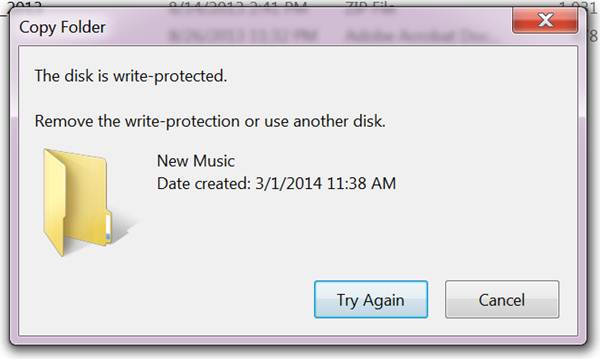
Let me tell you a short story about John. His best friend Jenny tells him to copy some new music that John has; from his computer to her Pen Drive. Jenny gives John her Pen Drive. John ‘copies’ the new music he has in his computer and just when he ‘pastes’ it in Jenny’s Pen Drive; he gets ‘The disk is write protected’ error. So if your situation is similar to John. You are facing the same problem that John does. You need to get out of this ‘disk is write protected’ mess. Don’t worry you’ve landed to the perfect page. To test your internet speed visit: broadband speed test. So now take a deep breath, step by step I will tell you how to get out of this problem. Don’t Worry it is not a major problem. In just some minutes you will solve this problem without the need of professional help. Just remember follow the steps as they are shown.
Ready?
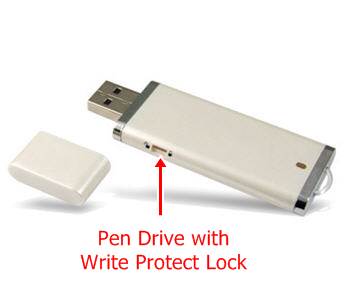
Step I – Does your Pen Drive have a Lock?
Most of the older Pen Drives have a lock as shown in the image below
So do check if your Pen Drive has a similar lock? If Yes, then push the lever to the unlock part. Lock and Unlock markings are made on the Pen Drive. If you don’t see any marking, try to put the lever on opposite side and then try.
Recently made Pen Drives do not use this lock. A similar lock can be seen on an SD Card. So if the SD card also gives a ‘Disk is Write Protected’ Error. Just change the position of the lever on the opposite side.
Must Read: New Whatsapp update now lets you hide ‘Last Seen At’
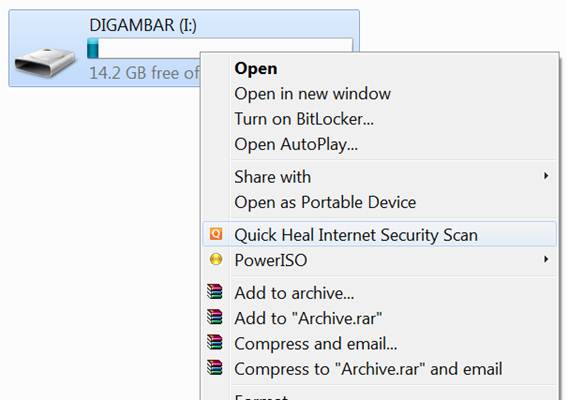
Step II – Scan the Pen Drive using Anti Virus Programs
Mostly what happens is; these errors occur due to mischievous nature of viruses, worms and trojans sitting inside your computer or even Pen Drive.
Do a complete scan of the System and Pen Drive using an updated retail version Anti Virus.
If the Antivirus does finds some viruses allow it to clean them.
Now again try to transfer some files into the Pen Drive.
If the copy process is successful. Congratulations! You did it all by yourself. But if it didn’t help don’t worry, try the next steps.
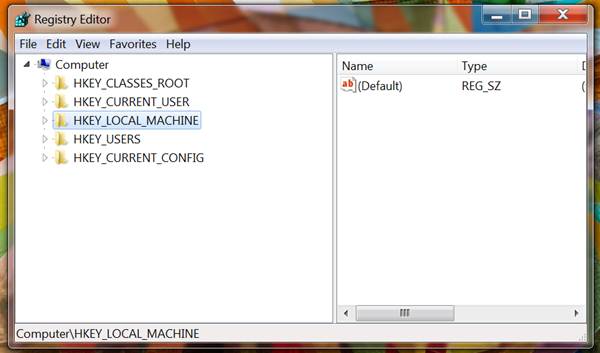
Step III – Get Inside your System Registry
Many errors and issues occur inside a Windows System. Most of them can be solved by using the Registry Editor.
So now we need to do some simple registry edit. Don’t worry its very simple. Just follow the steps shown below.
Ready?
-
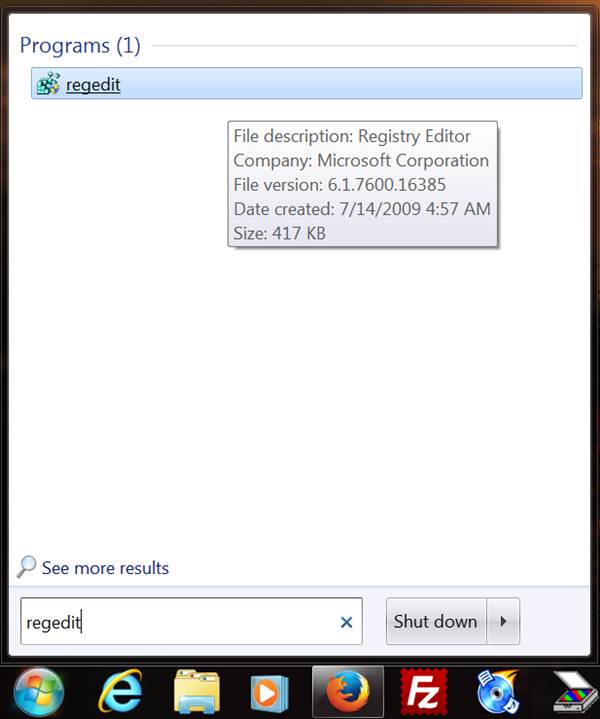
- Click on Start and type in regedit and open Registry Editor
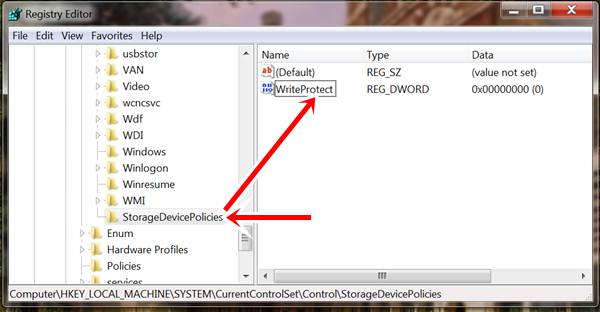
- Now inside Registry Editor follow the path as shown here
HKEY_LOCAL_MACHINE/SYSTEM/CurrentControlSet/Control/StorageDevicePolicies
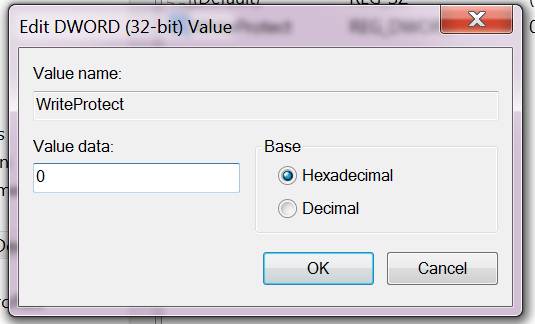
- Now on the right side of the window you will see WriteProtect word. Double Click on it and set the Value Data to ‘0’ (zero)
- Click on Start and type in regedit and open Registry Editor
Here ‘0’ denotes that the Write Protection on disk is OFF; whereas ‘1’ denotes Write Protection on Disk in ON.
- Close the Registry Editor for now. Do not copy any files. Restart your Computer first and then try to copy some files.
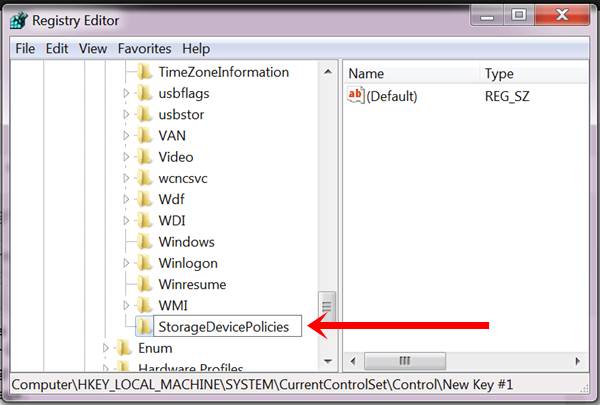
There might be a case where you couldn’t find the StorageDevicePolicies folder.
So what to do now?
The simplest answer is; if it isn’t there then lets create one. Its very simple and easy to create StorageDevicePolicies folder. I’ve shown a step-by-step guide to create StorageDevicePolicies folder just right below here.
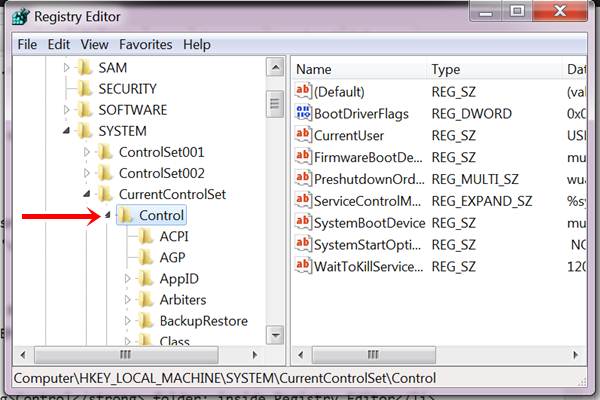
I am considering you are inside Registry Editor and to the Path I’ve mentioned above that is
HKEY_LOCAL_MACHINE/SYSTEM/CurrentControlSet/Control/
- Click on the Control folder; inside Registry Editor
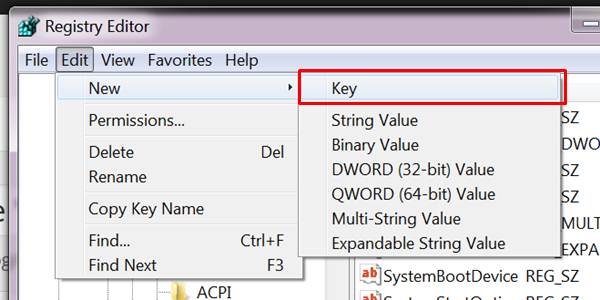
- Now Click on Edit sitting inside Menu Bar
Follow the path shown in the image. - Clicking on Key creates a New Folder inside Control. Rename it as StorageDevicePolicies
- Select StorageDevicePolicies folder, now right side of the window shows Default String. Right Click anywhere in that area, Select New and choose DWORD (32-bit) Value. Rename the new DWORD as WriteProtect
- Click on the WriteProtect and set its Value Data to ‘0’
Now before copying files from computer to pen drive. Restart the computer and then try to transfer these files.
Must Read: Top 5 Computer Pranks everyone must know
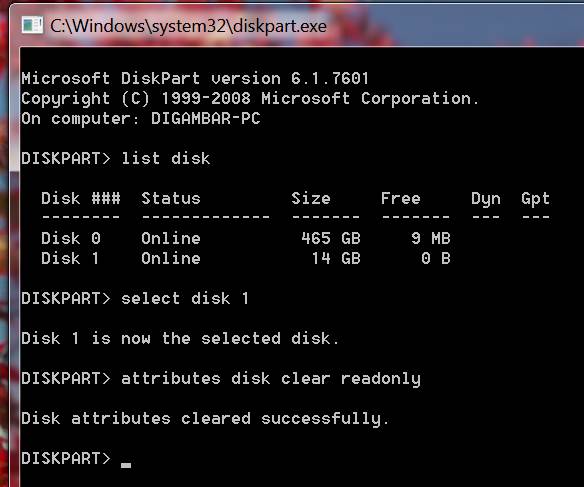
Step IV – Use the Diskpart Utility
Diskpart utility is a software built in Windows Operating System. It looks similar to a Command Prompt. Now we’ll try to remove ‘write protect’ error using the diskpart utility.
Below steps shows how to get into diskpart utility and perform some important actions.
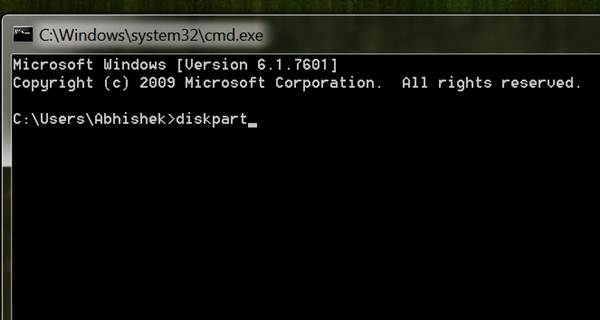
- Open Command Prompt. Click on Start button type in ‘cmd’ in the search box and select Command Prompt
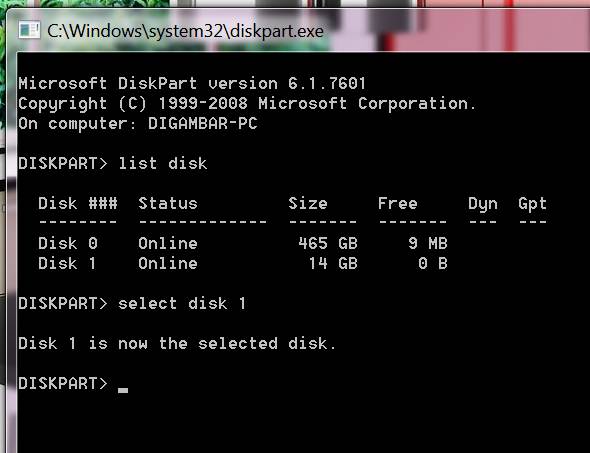
- Inside Command Prompt, type diskpart and hit Enter to get into diskpart utility.
- This is how the dispart utility looks; similar to command prompt window. Inside diskpart utility type in list disk to get a list of all kind of devices connected to the system. In my case the two disks are my computer hard disk and one connected Pen Drive
- Here the Disk 0 is primary hard disk while Disk 1 is the Pen Drive. In your case, if multiple drives are connected; your Pen drive might have different Disk number. To select your Pen Drive to perform furthur operations type in list disk 1 (where ‘1’ stands for disk number. See the number your Pen Drive gets and type the same number next to list disk)
- Now to turn off write protection type in attributes disk clear readonly
Restart your computer now and then try to transfer some files to you Pen Drive.
If the above step didn’t work for you then there’s only one last thing left to do.
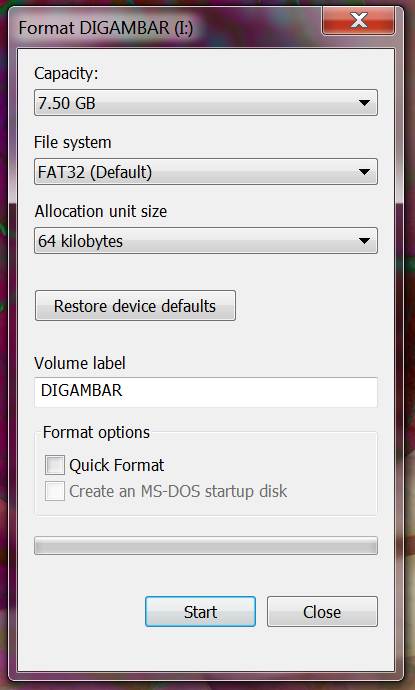
Step V – Clean format your Pen Drive to remove write protected error
Well I’m considering you’ve before or later might have formatted a Pen Drive.
So this is the last resort to remove write protected error.
Right Click on Pen Drive and Select Format. Now follow the attributes shown in the image below. Now that you’ve all the right setting click on Format.
This step will definitely remove ‘disk is write protected error’ from the pen drive itself.
I’ve tried to make this post more informative as possible and tried to explain in the most simplest way. So show us some love by sharing it on social networking sites like Facebook, Google+ and Twitter.
If you have any of the slightest doubt don’t hesitate to ask it in the comments section. You these tips worked for you then tell us your experience in the comments section to help other users too.
Have some time? Read our new list of best smartphones under 20000.
Read More
- Top Five Smartphones Under Rs. 10,000
- How to Increase uTorrent Download Speed
- [GIVEAWAY] Wondershare MobileGo for Android PC Suite Giveaway
- Wondershare MobileGo for Android Review – Best Android PC Suite